Bound to be the most entertaining flamethrower post to date, all the footage I have so far of me firing the flamethrower. Enough squirting water and pressure testing, lets get to the real deal!
First if you are impatient, here are a couple short GIFs:
Those GIFs and the next couple of videos are of version 1 of the flamethrower, with the longer hose and primitive nozzle. This video is the same as the first GIF but a bit better quality if you want to see the flame better:
The next two are fairly short, first in slow mo, second in non slow mo. Shot during the same tank of fuel as the first one:
And if you are a bit more patient, here is one continuous clip of the whole tank being shot off, taken at the same time as the other shots, but with slow mo in different places and as one continuous shot:
This next one is footage taken with the camera mounted to the wand during the daytime, with the upgraded tip. Im shooting a bit into the wind on this one. (A screenshot of one part of this video is where I got the picture for the top of my blog)
And then these last three are different perspectives of the same night shot. First, one taken from a ways away (Probably my least favourite)
One taken from the POV cam on the wand:
And my favourite, mostly because of the dialogue, one shot from up close by a friend:
Well there it is! All the footage I have of the flamethrower being fired. I probably won't get anymore till it cools down again and we get some rain due to the high forest fire risk, but when that time comes, I can't wait to test out the shorter wand hose and shorter propellant tank mount. Hope you enjoyed it!
In a previous post, I mentioned that I had been building a flamethrower on and off over the last year or so, and at the time of the post I had not completed it yet. I was also a little sparse on the details and pictures. Well anyways I have long since gotten it finished and actually revised the design slightly. So here are a few more details and pictures and whatnot of it all.
First off is this one. This shows most of the components of the flamethrower before it was assembled:
A quick picture of the tank as it is holding its very first pressure test:
And a closeup of the bottom showing where I drilled and tapped the bulkhead fitting into the tank.
Getting that hole was no easy task. I think I ended up turning a floor mounted drill presses table 90 degrees to what it normally is and using about 7 ratchet straps to secure it to the table at the right spot. But I got it made. You can see where I spent a bit of time with a sander, smoothing out any inconsistancies in the metal and removing all the paint where the o-ring seals.
Here you can see detail of both the torch mount, custom made from some scrap sheet metal, and the device that I made to prevent the fitting from turning in the bottom of the tank or coming loose. Hydraulic hose does not have any torsion at all to it. If you twist one end, the other one is twisting as well. I was worried that if I accidentally twisted the gun handle or whatever, my fitting would start to spin out of the tank or rub the o ring or any number of other bad things. So I took a piece of nice thick aluminum I had laying around, roughtly cut it to fit the bottom of the tank and extend out one side. Then I painstaikingly drilled and filed and drilled and filed and drilled and filed some more until I had a perfect hexagon that fit right over the fitting. I drilled a hole just on the side of the tank and secured a bolt thru it. Then hose clamped the bolt to the tank in exactly that position, effectively eliminating any possible movement.
Heres a picture of the flamethrower all completed and waiting to be
used. In this shot I have a HPA tank hooked up instead of a CO2 tank
because I believe I was again doing some water testing.
And this is how I store it. The barrel unthreads from the gun handle for ease of storage, the valve unthreads from the the top of the tank and the paintball remote line has a quick disconnect on it.
I mentioned in my previous post that the spray coming from the wand was dissapointing in range, and so before I even tested it with fuel instead of water, I went to the hardware store and purchased several 1/4" caps to thread on the end of the barrel and drill different sized holes in to see which was the most effective.
I ended up using one with a hole this size:
It did work fairly well, I have some video that I will post later showing the flamethrower firing using this tip, but I found that as it shot out, the harsh reduction in size caused the water or fuel to spray out and atomize more quickly rather than coming out in a stream as is more beneficial to a flamethrower. Nonetheless it did work and produced some impressive flame, it just needed to be improved.
Princess Auto came to the rescue with a 1/4"x1/8" reducing coupling and a 1/8" small nipple. Both designed to be used in hydraulic systems and therefore rated to 5000PSI or so. The 1/8" nipple is a fair amount smaller inside due to the thick walls needed to contain such pressure and has nicely beveled ends on both ends that cause a much smoother transition for the fluid and therefore more stream and less spray. The smaller ID means less fuel flowing thru, and therefore perhaps slightly smaller flame but longer lasting. I can always drill it out if I find myself needing more flow. Here are a couple of pictures of the upgraded nozzle:
Gotta have the first person camera to capture all the fire coming out of this thing, so I cobbled together a mount from PVC and pipe clamps. This is the only piece on this whole build that is just kludged together without much care. Its a non critical part, and I wanted it to be easily customizable.
Here's what the buisness end looks like. I think it looks kinda threatening personally :)
And for the final picture of the day, here it is as it is sitting right now. The other two modifications that you can see are the shorter line running from the tank to the gun handle and the shorter propellant tank assembly.
When I was first designing and building my flamethrower I wasn't totally sure how long of a hose I would need between the backpack tank and the gun handle, and because I didn't want to come up short, I bought and used a 6' hose. Which did indeed work, as you will be able to see from the videos of it in action, but it was not optimal. First of all, I am a tall guy and the hose hung down and almost dragged on the ground, not very practical. But more importantly, the longer the hose the more line pressure loss you have due to friction and other things. I'm sure if you asked an engineer, they would be able to tell you exactly why. I just know that as short as possible is better. So having some practical experence under my belt, I settled on a length of 3' for my new hose. Its just about the perfect mix of length for manuverability, without being too long and having too much line loss. Also hangs to a much more reasonable height above the ground. The second mod also has to do with simplification and line loss. The paintball remote line was quite long, and had the quick disconnect fitting on it. I already covered line loss, and the QD was a little finnicky. Needed to be presurized and then wiggled around to seal properly. And having to hose clamp the tank to the fuel tank and undo it every time you needed to change tanks got old fast. All those problems were solved by just buying a paintball ASA (the thing you screw onto the top of a paintball tank and just connecting it directly to the CGA346 adapter that threads into the valve. Less line loss, no finnicky o rings, and easy bottle changes.
To end this post off, here are the videos that I took while pressure testing once all the upgrades had been made. First one is pressuring it up and describing the modifications, second is from the first person camera showing the upgraded spray pattern. Enjoy!
Over the past year or so, I have been ocasionally working on a homebuilt liquid fuel flamethrower, just on and off, whenever I had some spare time or money to buy parts. Today I finally finished it enough to do my first testing on the sucker. No flames yet, just some underwhelming water spraying, but enough to prove that its all coming together.
Thats the beastie there. Built from an aluminum frame backpack, an old SCBA tank, a paintball tank and accompanying remote line, and some misc. high pressure fittings and hose. I haven't got the propane torch on the wand in this picture cause I've yet to finish the final mount for it, but its together enough to finally allow me to do a proper pressure test on the whole thing.
Safety has got to come first when you are building something like this. 800PSI, Gasoline, mistakes and sloppy work do not mix very well. So I am taking it slowly, making sure things are done right. Anyways, I got it done enough for a pressure test. I filled the fuel tank with water, screwed on the valve assembly at the top, laid it down on my concrete front steps and ran the remote line to the air tank inside:
When I actually run gasoline or diesel in it I will be using a 20Oz CO2 paintball tank as propellant to ensure an inert environment in the fuel tank and all the lines right up to the nozzle. Both fuels will not burn in a liquid form, only the vapours burn, but the CO2 ensures that there is absolutely positively no chance of a flashback into the tank. Safety first. But CO2 is expensive and I am just using water for the moment, so I am safe to use my 48cu.in. paintball HPA tank instead. The scuba tank I used to fill my HPA tank didn't have very much pressure in it, so I only managed to squeeze in about 1000 of a possible 3000PSI:
Doesn't really matter for the pressure test because it has a regulator that takes it down to 800PSI anyways, I just did not have the volume to keep the tank at that much pressure for very long.
With that all set up, I ask that you please direct your attention to the video below. Exceedingly poorly filmed iPhone first person flamethrower pressure testing:
As you can see from that video, (sorry for the shakeyness and the general poor filming quality, I'm a tinkerer, not a film student) my remote line disconnect had not seated all of the way and was leaking a bit. I fixed that up and tried again:
Mostly leak free. Most importantly, the fitting that I tapped and O-Ring'd into the bottom of the tank held beautifully, but there were two of the NPT connections I had not tightened up enough and had very small leaks. This would be exactly why you always test with water first.
The JIC union right off of the bottom of the tank sealed up nicely, it was just the two joints at the coupler. I have since taken them apart, re-doped them and re-tightened them to a tighter fit. At the time of writing I have not re pressured them back up to see if they hold now.
Couple of things to note about the video, first, again sorry for the terrible quality, trying to film and do stuff at the same time is rather difficult with no proper equipment. And second note the totally underwhelming spray coming out of the gun. This is do to a couple of things. Most notably that the propellant tank was as I mentioned only filled to 1000PSI. So after the very first shot, which I didn't even get in the camera lens, the pressure in the whole system dropped to probably drastically less than 500PSI. When a CO2 or properly filled HPA tank is used, it should keep the system at a fairly constant 800PSI throughout the entire full to empty cycle of the fuel tank. And second, I did not have any sort of restriction at the tip of the wand, it was shooting at as full of a volume as a 1/4" pipe could muster. If I were to reduce the size of the opening from which it sprays, it would shoot less volume but much farther.
Those things said, if you take a look at this video from this guy: (absolutely no relation or endorsement or anything besides me finding his video on youtube and thinking it was reletively neat) you will see that his stock flamethrower shoots water about the same distance, and flames much, much further. So even with it as it is, it should shoot some decent flame.
Anyways, thats it for now, be safe out there and have fun!
My title is sadly lacking in pazazz, but it aptly describes what this post is all about: My (right now at least) only pneumatic projectile firing device. First, a cupple of pics:
As you can see, it was constructed from two discarded propane bottles that have had their valves unscrewed, leaving a standard 3/4 in NPT threaded female fitting. These are screwed into custom manifold made from PVC pipe and fittings that leads to an 1/4in "M" type quick connect for connection to a compressor, and to a modified 1in sprinkler valve. The valve was modified by removing the electrical selonoid, filling the hole it screwed into with epoxy, and drilling a hole in the centre of the device, threading in a 3/8 to 1/4" metal bushing ( I orriginally had just the 1/4" fitting coming off the hose, but stress on it caused it to move a bit and leak), and finally threading in a coiled hose that leads to either a blow gun or (as I have right now due to lack of parts) a simple ball valve. When the blow gun (or ball valve) is opened, preasure on one side of the diaphram in the sprinkler valve is released causing the diaphram to open and lots of air to rush by. After the valve is an adapter that goes from the 1" female output of the valve, thru a cleanout tee and to a 2" male threaded fitting. I have another large combustion launcher that uses a 2" male threaded output, so with this I can use the same barrels on both of the cannons. The pictures are with my (rather pitiful) 1.5 in barrel, but I also have a short 4" one (you can see that one in the pics too), a 10 foot 2" one, a 20 foot 1" one, and an 8 foot 1/2" one. even with the inch and a halfer you see on there, I managed to put rocks and 1/2" pvc thru a large metal can, split a 1 foot long 2x6 piece of wood with a rock and break into multipul pieces a 2.5 inch thick paving stone using a metal pipe nipple.
I also once shot an unfrozen paintball thru a piece of 1/2 in thick wonder board using that 20' long barrel I mentioned.( for those of you who do not know, wonderboard is pretty much drywall, except made from cement.) Anyway, you get the picture, pretty powerful device, and lots of fun. Two last things before I go, one, if you are going to experiment with potato cannons etc, please wear, at the bare minimum, safety glasses, and do not use sun faded/scored/cracked or un pressure tested pipe, and two, NEVER, ever point these at anything living, or that has a chance of ricocheting back into you. I know, I hate dire warnings too, but you are dealing with stuff that WILL kill you given the chance.
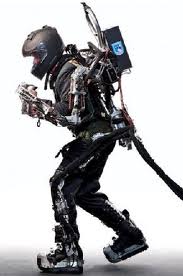
Lately I have been thinking about flamethrowers a bit, and I have come to the conclusion that if/when someone gets around to making a nice fairly battle-ready exoskeleton, that to combine the two would make a formidable weapon, if you look at it, they complement each others weaknesses and stregnths quite well. One of the main things keeping exoskeletons from appearing in anything but tethered forms is their large power consumption, and untill someone invents a usable arc reactor small enough to mount on one, the next best thing is gasoline. It is fairly abundant, very power-dense, and we have tech now that turns it into useful power. But there is the argument that having a big tank of gas on your back might not be a super good idea, after all, you DO have a big tank of gas on your back. However, the flamethrower requires a big tank of gas anyway. Another thing: the two big downsides of flamethrowers is 1, you need to get close to battle in order to use it effectively, exposing you to enemy fire.(armoured exoskeleton anyone?) and 2, flamethrowers are HEAVY, and even then, they do not have that much fuel capacity. What are the main things about exoskeletons? improving stamina and (here it comes...) Improving weight handling capacity! So you have a weapon with lots of fuel for burning stuff, armour that lets you get close enough to acutally use it, and the drawbacks common to both designs fairly accounted for.
By the way I am not talking about these lame propane powered flamethrowers (as cool as they are)
Yesterday I finished up my friend's paintball minigun. It now has a continous sparker system, chamber fan, 3-1 chamber to barrel volume ratio, is very well ballenced, and has the ridculas amount of power I have come to expect from any projectile-hurling device I build.
Chamber fan:
Battery pack:
COMPLETE! shown with end cap, paintballs, and starting fluid.
As to that 20,000% better remark, it was not just idle speculation/exaggeration, before the chamber fan was installed, sometimes the paintballs would only shoot a foot or two, due to incomplete combustion resulting from a less than ideal fuel/air mixture. With normal potato cannons, this is not such a big deal, because the potato generates friction, which keeps it in the barrel long enough for all of the fuel to burn, and thus develop more pressure, enough to hurl it a long way. Paintballs do not have as much friction, so the inital burn will propell them right out of the barrel, with really crappy force. The chamber fan ensures a full burn almost instantaniously, and thus all of the force is developed within a small fraction of a second, resulting with WAY more force. Now those 7-35 paintballs go over 200 feet, thus, 20,000% better.
I woke up this morning, and found sitting on the dinner table my prizes from the LMR tic tac toe challenge Naughts and Crosses. I decided I would get a lot more use from a micro magician than I would out of a mini driver, so even tho I came in third, I paid the difference, and got a micro magician. Oddbot (the guy running the challenge) also threw in a pack of female and male jumper wires. When I get some time, I am going to have some fun with my prizes.
On another note, I recently made a paintball cannon for my friend, 4 in ABS combustion chamber, with SEVEN 1/2 in barrels coming out the front, looks like a minigun, mwhahahahah. Anyway, it is not working REALLY well right now, needs a chamber fan, which I have. I cut down a 120mm computer fan untill it had just a bit of clearence between the inside of the chamber, and the tips of the fan blades, that was kinda finincky, spent a while with a calliper and some side cutters to get that working. Now I just need to stop by radio shack and buy a 12v AA battery pack, and it should be complete. These Pictures were taken when I was using a Piezo sparker taken from an old barbecue laying in the dump, it turned out to be unreliable, so I swaped it with an electroninc continous sparking battery opperated sparker.
I also got to go to Spokane WA. on Sunday and pick up some robot building parts, 4 6in lawn mower wheels. The holes in the middle are a bit big to mount directly on chopped up cordless drills, but that will soon be remedied with some metal bushings I will fabricate on the high school's lathe, a cupple of mid size castors, a few small ball castors and a big hunk of epoxy putty (for making a hemisphere for the HOG drive I will make eventually) rounded out the purchase.I love Harbour Freight Tools :)